
 Diagnostic
There are 0 items in your cart
View all items >Sub-totalbefore tax & fees
$0.00

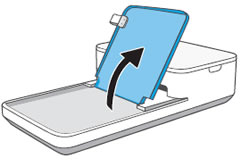
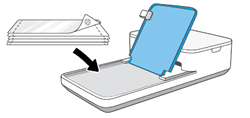
caution:Do not use standard photo paper. It can damage the printer and cartridge.
 , and then tap sprocket.
 , and then tap the Autofix wand
  or
or  . The app adjusts the photo automatically. Tap the Checkmark
 to save the changes, and then tap the Print icon
  ., and then tap the Adjustments icon
  .
Adjust the brightness and contrast, tap the Checkmark to save any changes, and then tap the
Print icon .
.
Adjust the brightness and contrast, tap the Checkmark to save any changes, and then tap the
Print icon .
HP Sprocket
© Copyright 2026 C&A Marketing, Inc. is the manufacturer of the HP® Sprocket®, under license from HP, Inc. HP and Sprocket trademarks are owned by HP Inc. or its affiliates. ZINK® Technology and ZINK® Trademarks are owned by ZINK Holdings LLC., used under license.


