- Laptops & 2-in-1s
- Business
- Premium
- Gaming
- Laptops
- ZBook Workstations
- Convertibles &
detachables - Deals
- Printers
- Home &
home office - Business
- Sprocket
- Print
only - Multifunction
- Scanners
- Large format &
digital presses
- Laptops & 2-in-1s
- Business
- Premium
- Gaming
- Laptops
- ZBook Workstations
- Convertibles &
detachables - Deals
- Printers
- Home &
home office - Business
- Sprocket
- Print
only - Multifunction
- Scanners
- Large format &
digital presses
Customer Support - Knowledge Base
HP Sprocket Studio App - Using the HP Sprocket App
This document is for the HP sprocket app.
The HP sprocket app is the main software to use with your Sprocket. With this app, you can take and edit photos, and then send the print jobs to your Sprocket.
Step 1: Install the HP sprocket app
Here’s how to connect the Sprocket app to your printer once it is downloaded to your mobile device:
-
To connect the Sprocket app via Wi-Fi®:
-
Press and hold the power button to turn on the printer. The power LED indicator will light up when fully powered on.
-
Open the Sprocket app. Then, select the main menu in the top corner of the screen.
-
Select Manage Printers. Then, tap Add New Printer.
-
Select the new printer “Studio Plus” from the list. Then, agree to connect your printer via Bluetooth.
-
Now after you select printer, you must enter Wi-Fi® credentials to configure printer on yourWi-Fi® network.
-
note:
Your mobile device should stay connected on the same Wi-Fi® network. Printer is only compatible with 2.4 GHz Wi-Fi® network. -
After entering credentials, confirm and wait for your printer to connect. The Wi-Fi® LEDindicator will blink showing that printer is connecting. The light will turn solid when printeris fully connected.
-
note:
After connection is complete, you can go to the app’s settings and see what Wi-Fi network your printer is connect to. -
To connect the Sprocket app via Hotspot Mode:
-
Press and hold the power button to turn on the printer. The power LED indicator will light up when fully powered on.
-
Open the Sprocket app. Then, select the main menu in the top corner of the screen.
-
Select Manage Printers. Then, tap Add New Printer.
-
Select the new printer “Studio Plus” from the list. To connect printer via Hotspot mode, select “No Network Available” in the Connect Printer to Wi-Fi® menu.
-
Then, open your Wi-Fi® list in your mobile device's settings. Select your printer from the list.
-
Type the password for the printer. The password will be the serial number on the label of your printer.
-
Next, wait for your printer to connect. The Wi-Fi® LED indicator will blink showing that printer is connecting. The light will turn solid when printer is fully connected.
-
note:
After connection is complete, you can go to the app’s settings and confirm that your printer is connected in Hotspot Mode.
Step 2: Print photos
Print photos using one of several available ways.
Print a saved photo
Print photos saved on your mobile device, social media, or cloud service account.
-
From the HP sprocket app: From the home screen, swipe left or right to select a photo saved on your mobile device, cloud service, or social media account. Edit the image as needed, and then tap the Print icon .Your photo prints.
-
From other photo apps: Select a photo, tap the Share icon or , tap the More icon (iOS only), and then tap the HP sprocket app option. Edit the photo as needed, and then tap the Print icon .Your photo prints.
Print a new photo
With the HP sprocket app, use the camera on your mobile device to take a photo to print.
-
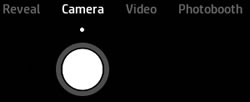
Tap the Camera icon or , and then swipe left or right to the Camera option.
-
In Camera mode, set a timer, change the camera orientation, or set a flash as needed.
-
Tap the Capture icon to take a photo.A preview of the image displays.
-
Edit the photo as needed, and then save, print, or share it.
You can also take and print a photo with your Sprocket 2-in-1. Go to HP Sprocket 2-in-1s - Taking Instant Photos (Camera Mode) for more information.
Print a frame from a video
Capture a video with the HP sprocket app, and then choose a frame to print.
-
Tap the Menu icon , tap sprocket, and then tap App Settings.
-
Return to the home screen, and then tap the Camera icon or .
-
Swipe left or right to the Video option.
-
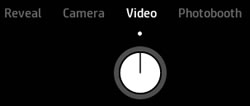
In Video mode, tap the Capture icon to start and end your video.
-
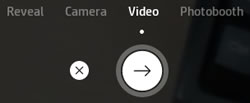
Tap the Right arrow to accept your video or tap the X to delete the video and start a new one.
-
Tap the Frame icon to select a frame to print.
-
Select the frame you want to print.
-
Android: Tap and drag the dot to the time of the frame you want to print, and then tap the Checkmark.
-
iOS: Tap and drag the square to the frame you want to print, and then tap the Checkmark.
-
-
Edit the frame as needed, and then save, print, or share it.
Print in Photobooth mode
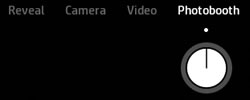
Use Photobooth mode to capture four sequenced images to print as one photo.
-
Tap the Camera icon or , and then swipe left or right to the Photobooth option.
-
In Photobooth mode, change the camera orientation or set a flash, as needed.
-
Tap the Capture icon to begin taking photos.
note:
To stop the timer between captures, tap the Capture icon .The camera captures four photos, with a countdown between each photo. After the photos are captured, a preview of the assembled photo displays. -
Edit the photo as needed, and then save, print, or share it.
Step 3: Explore additional features
Learn about other features of the HP sprocket app.
The preview screen
Take or select a photo in the HP sprocket app, and then edit, print or share your photos from the preview screen.
-
Resize: Use two fingers on the screen to zoom and rotate photos.
-
Edit: Tap Edit or the Edit icon , and then tap the Checkmark when you are done. For more information, see How do I edit my photos in Frequently asked questions (FAQs).
-
Print: Swipe up from the gray bar to print multiple copies or tiles, and then tap the Print icon . See the Print Tiles section for more information.
-
Share: Tap the Share icon or .
-
Save: Tap the Save icon or , and then navigate to the folder in which you want to save your photo.
-
View the print queue: Swipe up from the gray bar, and then tap Print Queue.
note:
In iOS, the print queue only displays when it contains photos. -
Exit: Tap the X.
The app print queue
Use the HP sprocket app print queue to view and modify upcoming print jobs.
-
View the print queue: Tap the Menu icon , and then tap Print Queue. The app might display two different queues.
-
The Printer Queue displays up to 10 photos sent to a specific Sprocket.
-
The App Queue displays up to 20 photos sent from your mobile device when you are not connected to a Sprocket.
-
-
Move a photo to the front of the queue: Go to the print queue, and then swipe a photo to the right. The Reorder icon displays, and the photo moves to the top of the list.
-
Remove photos from the queue: Go to the print queue, and then swipe the photo you want to remove to the left. The Trashcan icon displays, and the photo is removed from the queue.
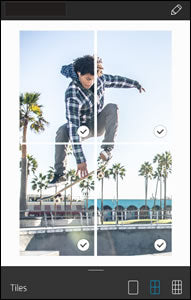
Photo tiles
Split your photo into tiles that print separately, and then assemble them to create a larger photo.
-
Take or select a photo.
-
From the preview screen, swipe up from the gray bar.
-
In the Tiles section, select the pattern you want. Tiled photos can print out in a 2 x 2 or 3 x 3 pattern.
-
Tap the Print icon .The tiles are sent to the queue as separate print jobs.
-
Assemble the printed photos to create a tiled photo.
Custom stickers
Create a drawing to add to a Sprocket print.
-
Take or select a photo.A preview of the photo displays.
-
Tap Edit or the Edit icon , and then tap the Sticker icon to view the sticker gallery.
-
Tap the Plus sign, fill the frame with your drawing, and then tap the screen to capture it.
note:
For best results, use a thick pen or marker on contrasting colored paper.
Custom stickers are saved in the custom sticker gallery. The first custom sticker you create becomes the icon for your custom sticker gallery.
-
Delete a custom sticker: Open the custom sticker gallery, and then long-tap the sticker you want to delete.
-
Delete the entire custom sticker gallery: Long-tap the custom sticker gallery icon.
Frequently asked questions (FAQs)
Review these frequently asked questions.
How do I navigate the home screen?
From the home screen, access menus and the print queue, and navigate your photo sources, such as the camera, and cloud or social media accounts.
-
Menus: Tap the Menu icon to access information about your Sprocket, messages and updates from the HP sprocket app, and Sprocket support.
-
Photo source: Swipe left or right to view the photo folders saved on your device, Instagram, Facebook, or Google accounts.
-
Print queues: Tap the Menu icon , and then tap Print Queue to see which photos are printing next.
How do I edit my photos?
After you take or select a photo, use HP sprocket app features to edit your photo.
-
On the preview screen, tap Edit or the Edit icon to edit your photo.
-
Select one of the edit icons to alter your photo.
-
Autofix: The app improves your photo.
-
Filters: Apply digital lens filters to create black and white, sepia-toned, or vivid photos.
-
Quick Action Edits: Choose from pre-assembled frames and decorations.
-
Frames: Add a frame around your photo.
-
Stickers: Choose a sticker from the gallery to add it to your photo, and then tap and drag the sticker to place it.
-
Brush: Draw a design on your photo. Tap the icons at the bottom of the screen to change the color, thickness, or sharpness of the brush.
-
Adjustments: Change the brightness, contrast, and color saturation of your photo.
-
Text: Type a message to place on your photo.
-
Crop/Rotate: Crop, rotate, or flip your photo.
-
-
Tap the Checkmark when you are finished.
What if I cannot print to my Sprocket?
Sometimes a print job sent from the HP sprocket app does not print. Check the following:
-
Bluetooth is enabled on your mobile device.
-
The Sprocket is loaded with 10 sheets or fewer of photo paper.
-
The Sprocket is charged and turned on.
-
The Sprocket is within range of your mobile device.
-
The firmware is up to date.
For detailed troubleshooting steps, go to Sprocket Does Not Connect or Print.
What can I do to improve Sprocket print quality?
Try these recommendations and procedures to help improve print quality.
-
Use genuine HP ZINK photo paper that is clean and wrinkle-free.
-
Use the HP sprocket app to adjust photo contrast and brightness.
-
Clean the paper path rollers with the Print Quality Card (formerly the Smartsheet).
-
Allow the Sprocket a few minutes to cool down between print jobs.
-
Store the photo paper in a cool, dry place and avoid contact with water.
-
Make sure the firmware is up to date.
For detailed troubleshooting steps, go to Improving Print Quality.
Why is my Sprocket printout blank?
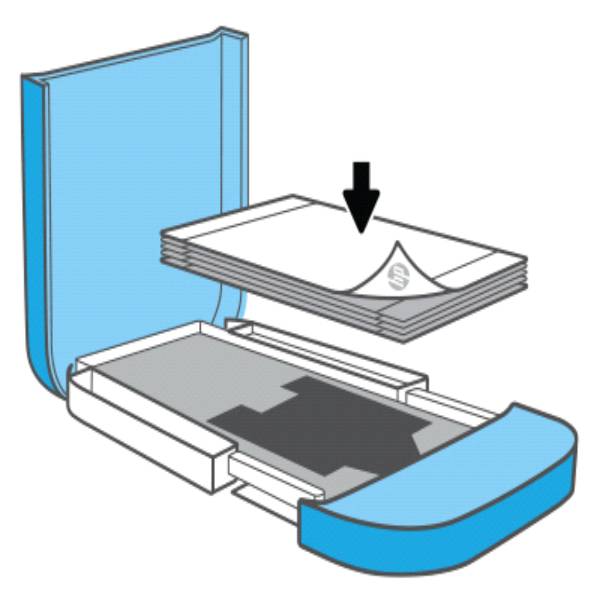
The photo paper might be loaded incorrectly. The photo paper must be loaded into the input tray with the HP logos facing down.
-
Turn off the Sprocket.
-
Remove the paper cover, and then remove any photo paper from the input tray.
-
Reload the photo paper with the HP logos facing down.
-
Replace the paper cover.
-
Turn on the Sprocket, and then resend the print job.
Where can I go for more information about my Sprocket?
For more information, go to the HP Sprocket homepage.
Double-click to edit...
Examples: "Sprocket paper jam", "Sprocket firmware update"
Language:
English
- Arabic (العَرَبِيَّة)
- Chinese Simplified (简体中文)
- Chinese Traditional (繁體中文)
- Dutch (Nederlands)
- English
- Finish (Suomi)
- French (Française)
- German (Deutsche)
- Greek (Ελληνικά)
- Hebrew (עִברִית)
- Italian (Italiano)
- Japanese (日本語)
- Korean (한국어)
- Polish (Polski)
- Portuguese (Português)
- Russian (Русский)
- Spanish (Español)
- Sweddish (Svenska)
- Turkish (Türkçe)
HP Sprocket
- Privacidad|
- Términos de Uso|
- Acuerdo de licencia de usuario final
- Cancer and Reproductive Harm - www.P65Warnings.ca.gov
© Copyright 2024 C&A Marketing, Inc. is the manufacturer of the HP® Sprocket®, under license from HP, Inc. HP and Sprocket trademarks are owned by HP Inc. or its affiliates. ZINK® Technology and ZINK® Trademarks are owned by ZINK Holdings LLC., used under license.