
 Diagnostic
There are 0 items in your cart
View all items >Sub-totalbefore tax & fees
$0.00

Once you’ve gathered all your materials, choose about 8 photos from your smartphone’s camera roll, and add them to the queue in the HP Sprocket App. Here you can edit, add filters, put in a framing border, or crop the photos you wish to feature in this project. Now you’re ready to create.

STEP 1:
Go through the photos you wish to use for this project, again, you should choose about 8 of them. Load them into the free HP Sprocket App. There you can edit, crop, or add holiday themed accessories (candy canes, snowflakes, lights, and more) to your photos. Once chosen, edited, and designed, print your pictures with the HP Sprocket Printer on the HP Zink Zero Ink Paper. You might want to print a second copy of each picture, just as a back-up, incase a mishap occurs.
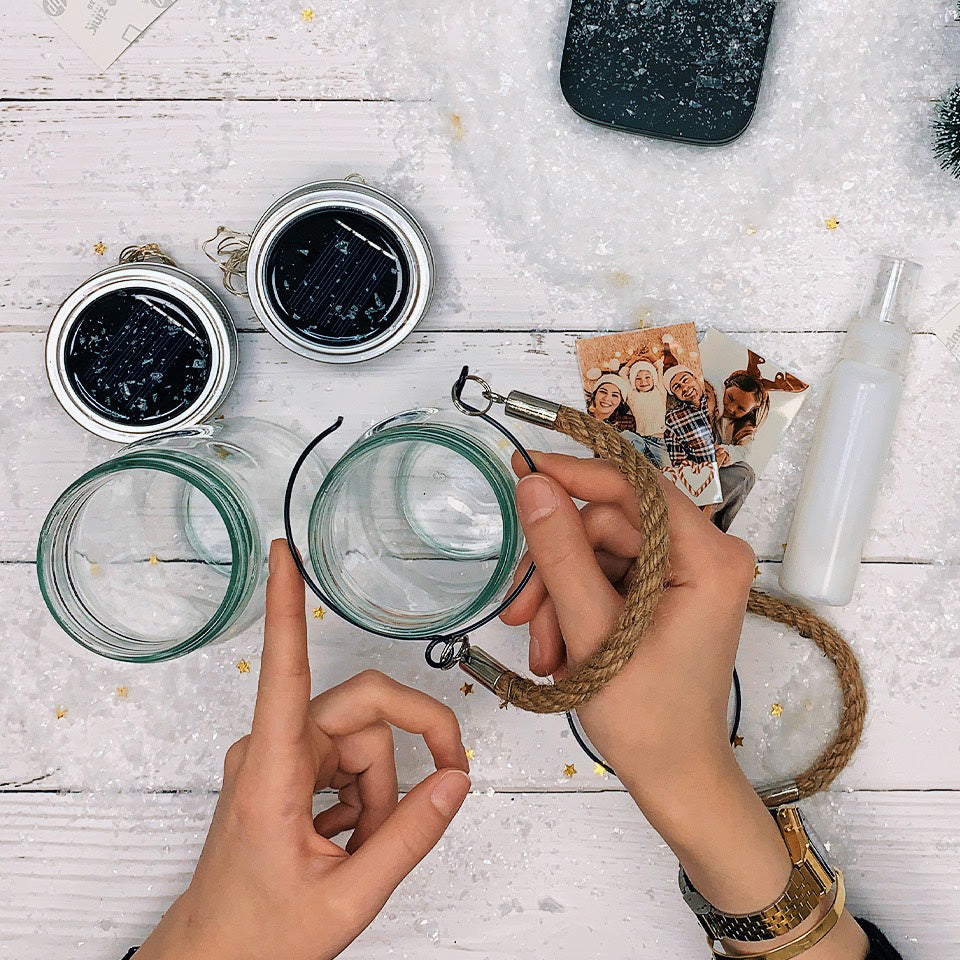
STEP 2:
Take the string, or the mechanism you wish to use, and attach it to the Mason Jar. You want to put it on the top part, slender area, under the tightening grooves of the jar. Make sure it is secured tightly enough that it can support the weight of the jar while it dangles. After you’ve secured your attachment, test its durability by picking it up by the string, or mechanism you’ve attached, and hold it just slightly above a table, so if it’s not secure enough, the jar will not break. If it does not dangle safely, tighten the connection on the Mason Jar or consider a different hanging option, such as metal loop, thicker string, decorative rope, or whatever you wish.

STEP 3:
Add glue to the bottom of your decorations. Make sure you apply enough adhesive that your decorations remain firmly in place, but not so much that the adhesive flows out from the bottom of the decoration, or makes it appear that it is levitating.

STEP 4:
Place the decorations you just put glue on in the Mason Jar, adhesive side down. Whether it be the bottom or sides of the jar, make sure the decoration is securely in place, will not move, and leaves plenty of space for your picture you wish to display. Allow the glue on the decoration to dry before moving on to STEP 5 and STEP 6.

STEP 5:
Take a photo you’ve printed from your HP Sprocket Printer and put a thin line of glue along the bottom of the photo you wish to display. Make sure you only use a thin line of glue on the photo, adding too much can obstruct the picture and ruin the picture, in which case, use the copy of the picture you printed out as a backup.

STEP 6:
Place the photo into the Mason Jar, in front of the decoration that has dried into place. Make sure you put the photo in place with the side the glue is on. If the photo is damaged in any way during this process, use a backup photo as a replacement. Allow the glue on the photo to dry before continuing.

STEP 7:
After the glue on both the photo and decorations are completely dried, it’s time to add the fake snow. Add the fake snow to the bottom of the Mason Jar. Use about .25” of snow on the bottom of the jar (recommended). If you wish to add more snow, just be sure to not cover your photo you’re displaying. Helpful hint: Add a little fake snow to your decoration, especially if it’s a tree. It adds to the seasonal feeling of your project. Don’t use too much snow and cover up the decoration.

STEP 8:
Once the picture, decorations, and snow are all in place, place the lid of the jar on top and seal it tightly. Make sure the lid is completely closed and tightened. Repeat STEPS 1 – 8 for each jar you wish to create. Now, you are ready to display. Place your beautiful, homemade jar on the tree, or on your table, counter, shelf, TV stand, or wrap it up and give it a loved one.

HP Sprocket
© Copyright 2024 C&A Marketing, Inc. is the manufacturer of the HP® Sprocket®, under license from HP, Inc. HP and Sprocket trademarks are owned by HP Inc. or its affiliates. ZINK® Technology and ZINK® Trademarks are owned by ZINK Holdings LLC., used under license.


